A backpack is a carry system, not just a shape
A custom backpack is only useful if the day’s load actually fits, the weight sits comfortably on both shoulders, and everyday items — a laptop, a charger, papers, a bottle — have a planned place. A photograph of a silhouette does not tell you whether the computer will go in cleanly, whether a bottle will stay in a side pocket, or whether the strap joins will take a full bag.
“Backpack” on a product page is a way of carrying, not a size and not a single construction. Two bags that look similar can differ in the back panel, the strap padding, the device sleeve, and how the bag behaves when it is only half full.
State, in the brief:
- The load the bag must hold: the device or devices, whether a case stays on in daily use, and the other items carried on a typical day.
- How the bag will be worn, and for how long: a short walk from a car, a full commute on foot or by bicycle, or most of a working day.
- Which failures would make it unsuitable: a sleeve that is too tight or too loose, straps that cut in or pull at the join, a back panel that sits unevenly, a side pocket that will not hold a bottle, or a zipper that is awkward when the bag is packed.
How to measure the laptop before you ask for a sleeve size
If the backpack must hold a computer, measure the device as it will be carried, not as it appears in a manufacturer’s marketing table. The method is the same as in the laptop bag guide:
- Close the laptop and leave on any case, bumper or sleeve that will stay on in daily use.
- Record three numbers, in millimetres if you can: width (left to right), depth (front to back), and thickness (top to bottom when the laptop is closed). Include feet, a hinge that sticks out, and any case lip.
- Photograph the device next to a ruler, from the front and from the side. If the line includes more than one device (for example a 14-inch and a 15.6-inch model), measure both and say whether one backpack must accept both, or whether you will split the order into two sleeve sizes.
- Say how the laptop should go in: from the top or into a rear compartment, and whether the user needs to take it out often at a desk or a security check.
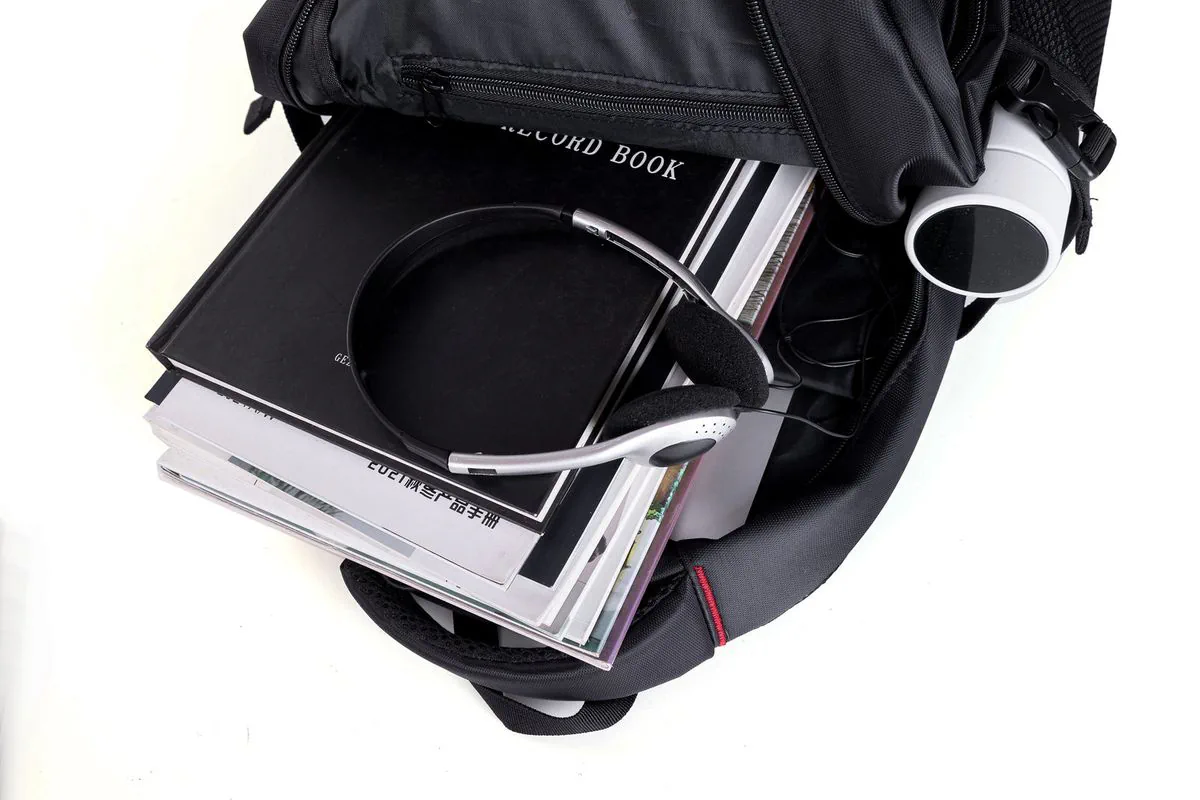
The sleeve still needs a small amount of ease so the device can slide in and out without being forced. How much ease is right depends on the padding, the lining and the opening. Do not treat a published “fits up to 15.6-inch” line as a substitute for your measurements, and do not assume every backpack on a site uses the same sleeve. On this website, only one of the two published backpacks states a 15.6-inch fit; the other describes padded laptop and tablet compartments without a screen-size rating. Agree the fit on a sample, with the real device.
If the same program also needs a briefcase, choose each form from how it is carried, then keep color, hardware and logo placement consistent across the line. A backpack is a different pattern from a briefcase — not a briefcase with straps added. The laptop bag guide covers that choice, and how to measure, in more detail.
Backpack, briefcase or tote — choose the carry first
The form of the bag should follow how it is carried and what else goes in it, not only which photograph you prefer.
- A laptop backpack puts the weight on both shoulders, usually with a padded back panel, and often has side pockets for a bottle. It is the more practical form when the user walks or cycles, or carries a heavier daily load.
- A briefcase is typically carried by a handle or a single shoulder strap, and usually sits beside a desk or under a seat more naturally than a backpack. It is the better starting point when the bag is set down often and is not worn on the back for long periods. See the laptop bag guide for briefcase constructions.
- A tote is carried by handles, often with an open top or a simple zip. It can hold a laptop for a short trip, but it is not a padded carry system with a back panel and dual shoulder straps. If the brief is really a tote program, treat it as a different bag, not as a backpack with the straps removed.
If the program needs more than one form (for example a backpack and a briefcase in the same fabric and color), say that clearly and treat color, hardware and logo placement as a small line, not as two unrelated products.
Straps and the back panel — the points that usually fail
A backpack’s carry system is what the user feels all day. These are the points to specify and then to test.
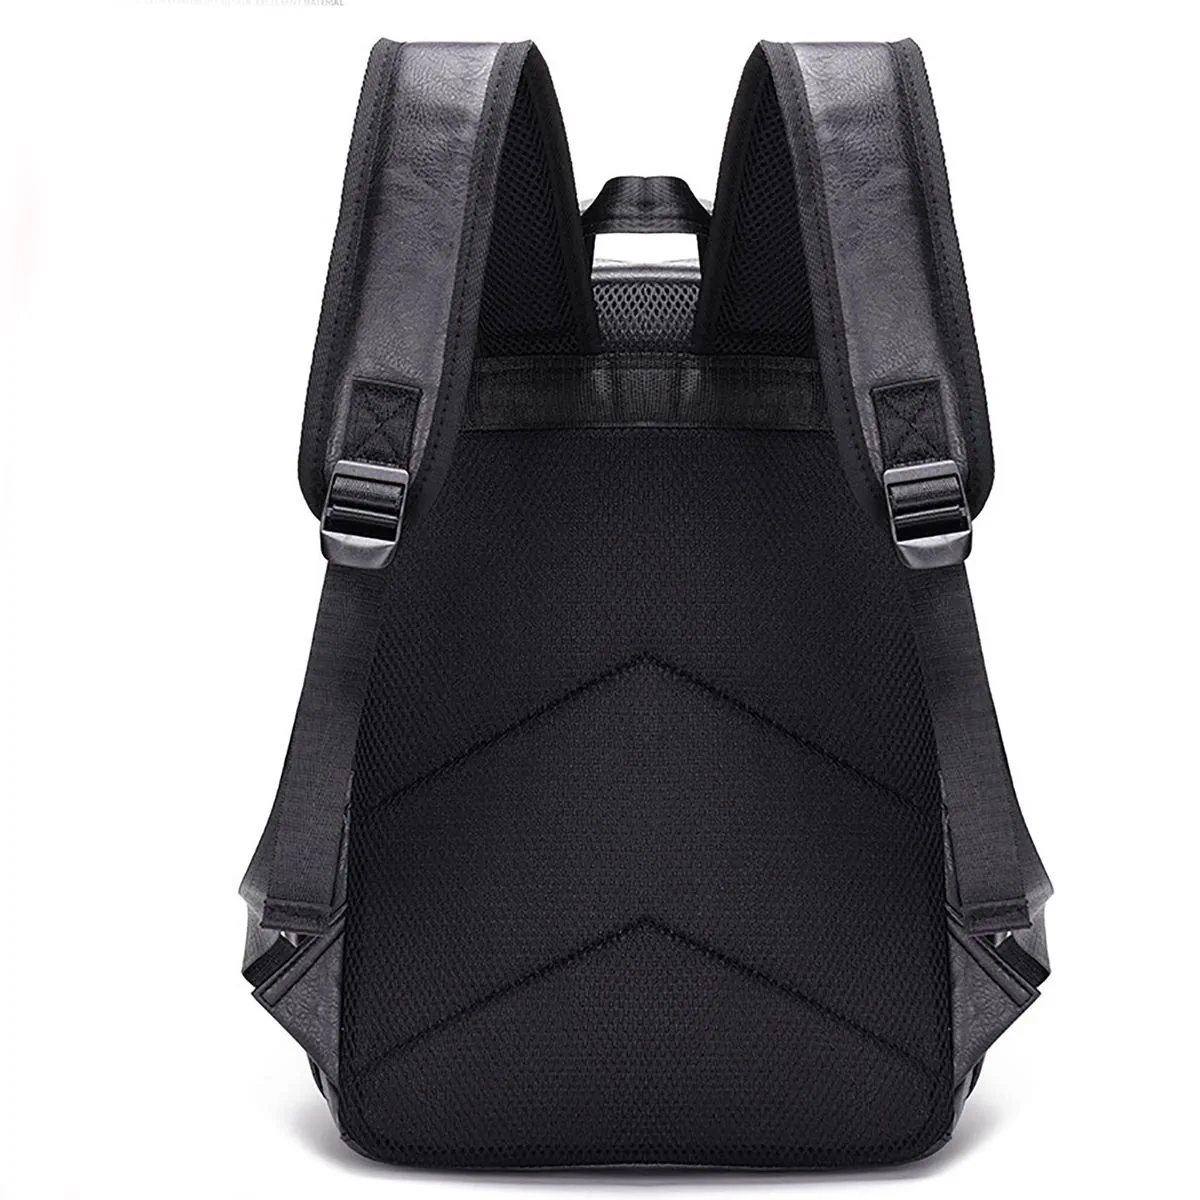
Shoulder straps. These are load-bearing parts. Both published backpacks on this site have padded, adjustable shoulder straps. Test them with a representative load: the laptop, the charger, and whatever else the bag is meant to carry. Watch the stitch line where each strap is joined to the body — at the top of the bag and at the lower attachment. Those joins are a common failure point in daily use. Check that the length adjustment holds when the bag is full, and that the padding does not collapse into a thin edge on the shoulder.
The top grab handle. This is used to lift the bag onto a hook, a conveyor or a seat, not only as a decorative loop. The published PU backpack has a padded top handle; the published fabric backpack has a top grab handle. Lift the packed bag by the handle and watch the join. Note whether the handle cuts into the hand.
The back panel. This is the surface that sits against the wearer. The published PU backpack has a breathable padded mesh back panel; the published fabric backpack has a contoured padded back panel. “Breathable mesh” means a mesh layer over padding so some air can move; it is not a cooling claim. “Contoured” means the padding is shaped rather than a flat slab; it still has to be checked on the body. Put the packed bag on, adjust the straps, and walk. Notice whether it sits evenly, pulls away from the back, leans to one side, or digs in.
A chest strap is not automatic. Neither published business backpack on this site lists a chest strap. If the user cycles, or wears the bag for a long walk, and you need one, write it into the brief. Do not assume it is included because you have seen it on other backpacks.
When PU and fabric are not interchangeable
The shell changes how the bag looks, how it stands, and how it scuffs. It also changes how a logo can be applied. Choose the material family from the job, then lock the exact cloth or PU on a swatch and a sample.
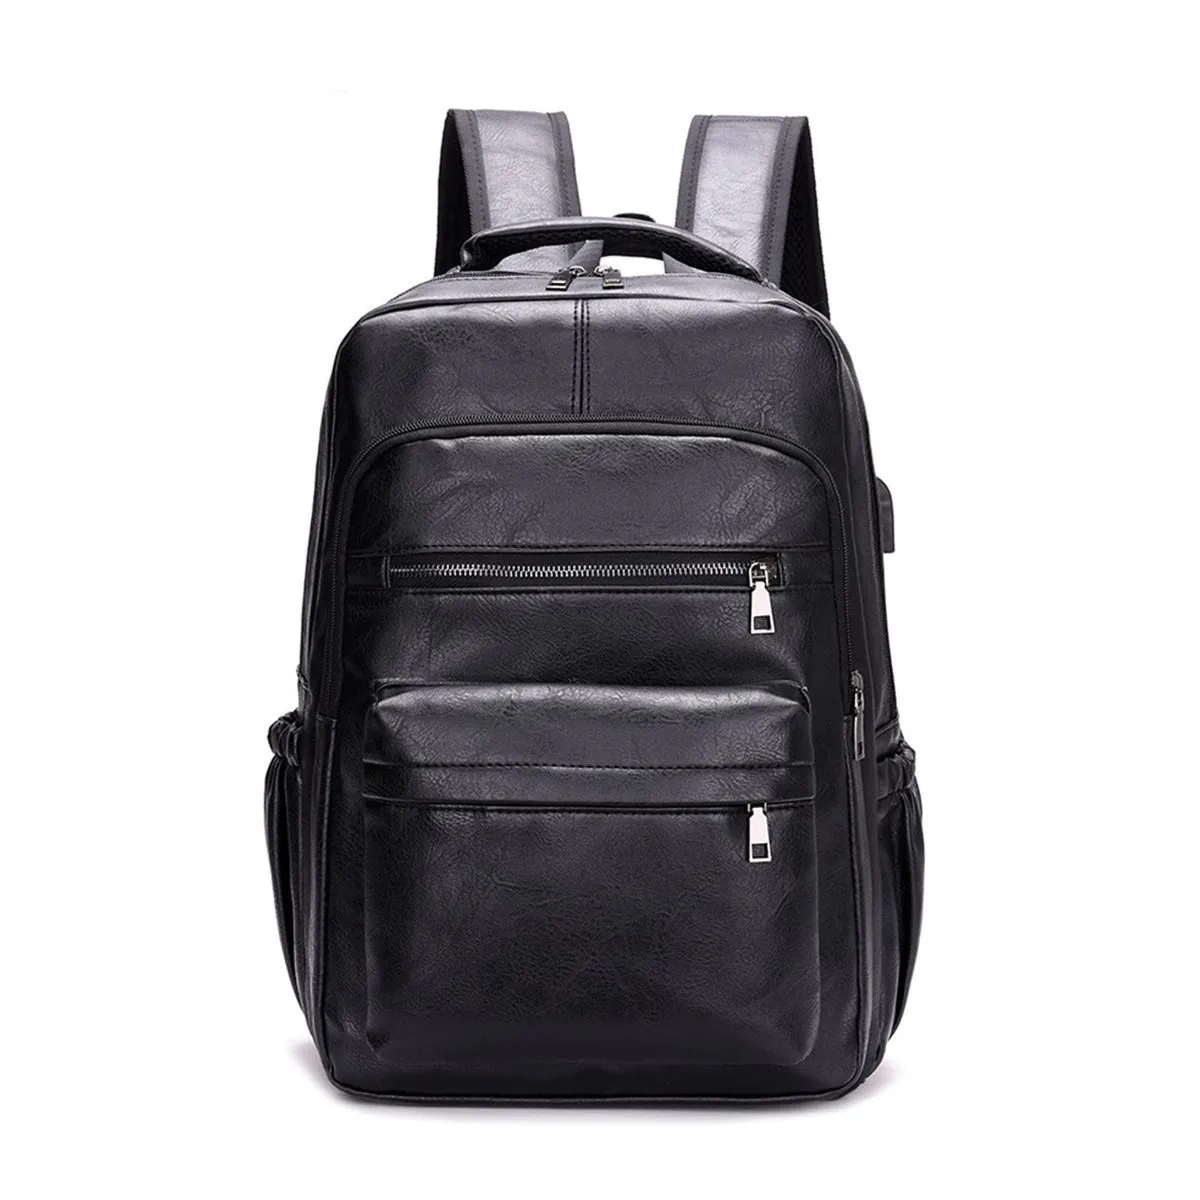
Textured PU vegan leather (no animal leather) is the published shell on the Executive series backpack. It is a leather-look material, not a woven fabric. It usually has more structure than a soft cloth backpack, and it creases and scuffs differently — especially at corners, zipper tracks and strap joins. It is shown in black, tan and dark brown; custom colors can be developed. On the sample, check the hand feel, whether the bag stands when it is set down, and how the surface looks after a wear test. Do not treat a studio photograph as a substitute for that check.
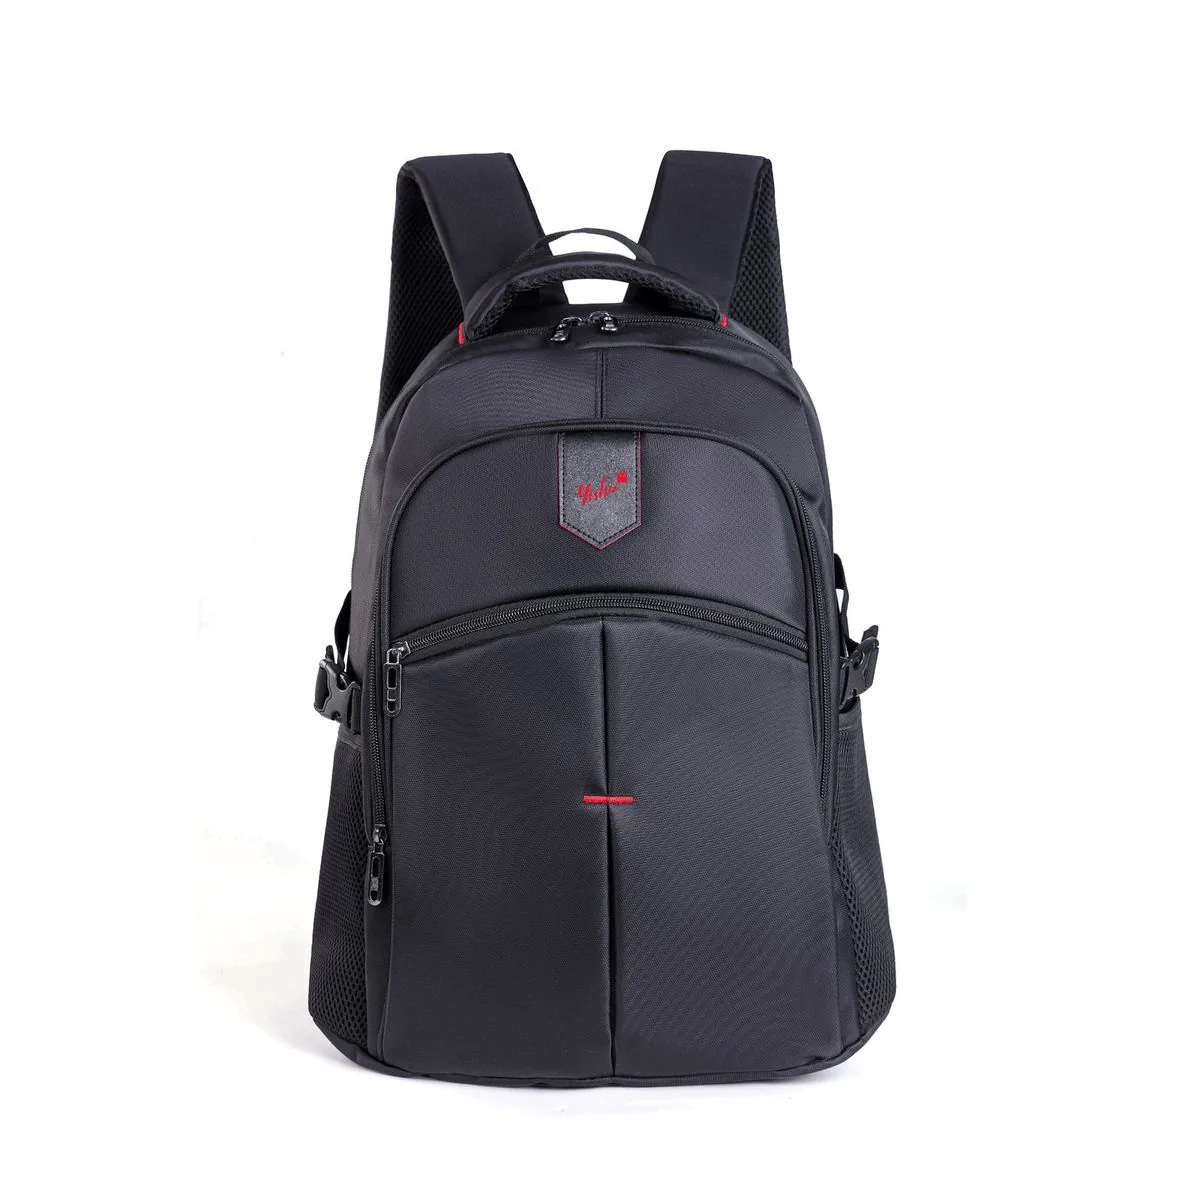
“Fabric” is not a complete specification. The published Commuter series backpack is described as a black fabric backpack. The live product page does not name the cloth or give a weight. If you need a named material, a denier or GSM, or a particular hand feel, write that into the brief and confirm it on a swatch and the sample. Do not invent a fabric name for a catalogue or a listing.
Water-resistant is not waterproof. A photograph of water droplets on a fabric is not, by itself, a performance claim. On the Business Laptop Backpack with Side Compression Straps (YS-BP02), the product page shows droplets on the shell and states that final material performance is confirmed through sampling. Do not treat that photograph as a waterproof or water-resistant rating, and do not write one into your marketing unless you have agreed and tested it. If light rain or a wet table matters to your line, say what you need in practical terms and confirm it on the sample.
Compression straps and USB ports — add them only if you need them
Compression straps buckle across the sides of the bag. On the published Commuter series backpack, buckle straps sit over mesh side pockets. They tighten the bag when it is not full, and they help stabilize a bottle in the mesh pocket. They are a functional part, not trim. On the sample, buckle and unbuckle them with the bag packed and unpacked. Walk with a bottle in the side pocket and see whether it stays. Check that the straps do not block a zipper or twist against the wearer.
A USB port on a bag is usually a passthrough, not a charger. On the 15.6-Inch PU Leather Laptop Backpack (YS-BP01), the side USB port is for a power bank that is not included. A cable inside the bag connects a power bank in a pocket to a socket on the outside. The bag does not contain a battery and does not charge a device on its own. If your market has rules for electrical products, a passthrough cable is a different question from a built-in battery; do not describe it as a built-in charger. If you do not need the port, do not add it. If you do, confirm on the sample that the cable can actually reach, and that the port is usable when the bag is worn.
Published reference constructions you can start from
The two models below are the backpacks published on this website. They are starting points. Device fit, padding, organization, materials, color, branding and packing are confirmed before sampling. If you need a silhouette that is not on the site, send that form clearly so the construction can be mapped before a sample is made.
PU (vegan leather) laptop backpack — Executive series. See the 15.6-Inch PU Leather Laptop Backpack with USB Port (YS-BP01). It is a business backpack in textured PU vegan leather (no animal leather), approximately 40 × 28 × 14 cm (15.8 × 11 × 5.5 in), with a padded compartment for laptops up to 15.6 inches, organizer pockets, two front zip pockets, a side USB passthrough for a power bank that is not included, elastic side pockets, a zipper closure, padded adjustable shoulder straps, a padded top handle, and a breathable padded mesh back panel. It is shown in black, tan and dark brown; custom colors, logo and packaging can be developed. Branding routes noted on the page include embossing or debossing, a metal badge, a woven label or a printed patch. Use this when the line needs a backpack in a leather-look material rather than a fabric backpack, and when a 15.6-inch padded sleeve is the intended starting point.
Business laptop backpack with side compression straps — Commuter series. See the Business Laptop Backpack with Side Compression Straps (YS-BP02). It is a black business backpack with a padded laptop and tablet compartment, a main compartment, two front zip pockets, mesh side pockets with buckle compression straps, padded shoulder straps, a contoured padded back panel and a top grab handle. Red accent trim and a front rubber badge are shown as a house style; your logo and colorway replace them. Branding options noted on the page include a rubber badge, embroidery or a woven label.
The live product page for YS-BP02 does not publish overall dimensions, a fabric name, or a screen-size rating for the laptop compartment. Treat this model as a construction starting point: send your device measurements, and ask the factory to confirm overall size, material, sleeve fit and any water-resistance expectation on the sample. Do not invent those figures for a catalogue or a listing.
Two other backpacks on the site are not substitutes for the constructions above. A children’s school backpack is a different brief — the published kids backpack and lunch bag set (YS-KD01) is a school set, not a business backpack, and is not covered here. An insulated food delivery backpack (YS-DL01) is a work tool for rider or fleet use, not a daily office backpack; that brief is covered in the cooler bag guide.
What to lock in writing before a sample is made
- The load and the device measurements, including any case, and whether one bag must accept more than one device.
- Compartment design. Opening direction; laptop and, if needed, tablet sleeves; lining; padding at the base and corners; the ease needed to insert and remove the device; the main compartment and front pockets.
- Carry system. Padded shoulder straps; back panel (mesh, contoured padding, or another construction); top grab handle; a chest strap only if you need one. How the loaded bag will be tested on the body.
- Side pockets and compression. Elastic or mesh bottle pockets; buckle compression straps if they are part of the brief — and whether a bottle must stay in place when the user walks.
- Shell and structure. PU, a named fabric, or another shell; whether the bag should stand upright when set down; any water-resistance expectation, described in practical terms, not as a photograph of droplets.
- Hardware and extras. Zipper type if it matters; buckles on compression straps; USB passthrough only if you actually need it, described as a passthrough, not as a charger.
- Color, branding and packing. Body and trim from physical swatches — and, if you start from the Commuter series reference, say what replaces the shown red accent and house rubber badge. Logo method and placement should suit the actual shell (PU and fabric do not take every method the same way) and be confirmed on the sample. Include labels and export or retail packing.
A sample-review checklist you can actually run
Use the intended laptop — in its usual case, if that is how it is carried — not a smaller substitute. Wear the bag; do not only inspect it on a table.
- Measure the bag and the sleeve at the agreed points. Compare both with the specification, not only the outside of the bag. If overall size was not published on the reference, this is where it is locked.
- Insert and remove the laptop several times, in the direction the user will use. It should not have to be forced, and it should not rattle loosely if the brief asked for a close fit. If a tablet sleeve is specified, test that device too.
- Load the rest of the day’s items (charger, papers, bottle if a side pocket is specified). Close every zipper.
- Stand the bag on a desk or floor if the brief requires it to stand. Note any collapse or lean.
- Put the bag on, adjust the straps, and walk with the representative load. Watch the strap joins at the top and at the lower attachment, whether the length adjustment holds, and whether the bag sits evenly on the back. Lift it by the top handle as well.
- Check the back panel against the body: even contact, no hard edge digging in, and no obvious lean to one side. If breathable mesh or contoured padding was specified, confirm that the construction matches what was agreed, not only that a padded panel is present.
- Work every zipper when the bag is packed, including front pockets and any side or sleeve zipper.
- Check side pockets and compression straps as they will be used. Walk with a bottle in the pocket. Buckle and unbuckle compression straps on a packed and an unpacked bag.
- Check any special feature as it will be explained to a customer. If there is a USB passthrough, confirm that it is a cable path for a power bank, and that the port sits where a cable can actually reach when the bag is worn. If water resistance was requested, do not approve it from a droplet photograph alone.
- Check logo, color and labels against artwork and swatches in consistent light. Write one numbered comment list. Mark each item accept, revise, or factory to advise.
The custom bag RFQ checklist has a method for comparing two quotes and freezing an approval reference. If material evidence is required for the destination market, how to read bag material reports explains how to match a report to a specific component rather than treating one sample report as a claim about every bag.
What to send with the first inquiry
- Device measurements, and a photo of the laptop next to a ruler if possible (include any case)
- The intended daily load, and how the bag will be worn
- Preferred form (laptop backpack, or a backpack plus another form in the same line)
- Target quantity and destination market
- Carry needs (back panel, straps, handle, chest strap if required) and any water-resistance expectation
- Preferred materials and colors, if known — or say that these are still open
- Logo artwork and preferred decoration method
- Packing needs and target date
- Reference photos, a tech pack, or a physical sample
Submit these on the inquiry form and choose Backpack as the product type. The form accepts JPG, PNG, WebP or PDF attachments. If the same inquiry also covers a matching briefcase, say so in the message.
A laptop backpack is not a briefcase — and not a delivery pack
A backpack and a briefcase can both hold a laptop; they do not replace each other. Choose from how the bag is carried and what else goes in it, then size the sleeve from measured devices, not from the screen-size label alone. On this site, a “15.6-inch” backpack is a published starting point on one reference model; the other published backpack does not state a screen-size rating. If your line must serve more than one device, measure each one and say whether you want one compartment that accepts the larger device, or two sizes.
A delivery backpack is a different brief again: it is built for food carry and rider use, not as an office laptop backpack. See the cooler bag guide if that is the job.
If you are ready to brief a factory
Dongguan Yishu Handbag Products Technology Co., Ltd. is a direct OEM/ODM bag factory in Dongguan, China. The models above are reference styles. A style that is not shown can be developed from your design, sample or tech pack.
The reference MOQ is 500 pieces per confirmed configuration. Special material, hardware or multiple colorways may change the final MOQ. Bulk production is typically 15–20 days, confirmed per order after sample approval, material review and order confirmation. Programs are planned to move through the six checkpoints on the quality page: requirement review, material check, pre-production sample, in-line inspection, final inspection, and packing release.
If you would like a backpack construction reviewed for your program, send the intended load, a reference and the target quantity through the inquiry form, or write to sales@yishubags.com. A clarified specification and a sample route are the usual next step.